Velos Chair
Ideation
The project began with concept design and development in the form of sketches. Each team member came up with their own concept and pitched it to the group and our professor. Once a concept was chosen based on design, feasibility, expectations, and general consensus, we moved into a finalized design direction as seen below. During this stage, discussion of materials to be used in construction and methods of construction were the main focus. The legs and back supports were changed from plastic to steel tubing for cost, strength, and manufacturability. Exploded views were explored to help better understand the construction of the chair. With the swap from plastic to steel, fabric was added to increase the comfort of the seat and back rest.

Design Process
After a few final design tweaks, a sketch model was then constructed to better understand the form, ergonomics, and ideal materials to use. The sketch model was made from PVC piping, MDF, cardboard, foam and fabric. The model showed us that we had to choose a smaller tubing size as well as a much thinner foam. We revised how the seat attached to the frame, rather than nuts in the side of the frame, as seen above, we added two cross supports under the seat and fastened bolts from the underside.

CAD Model
The next step, for our team, was to computer model our design for fabrication. The process took several iterations to finalize all measurements from the sketch model and have our angles ergonomically correct. The CAD modelling helped aid in the clarification of how the chair would be assembled and manufactured. The files were separated into two groups, steel tubing, and bent plywood. This allowed us to hand the tubing files off to a manufacturer while we worked on bending plywood.

Build Process
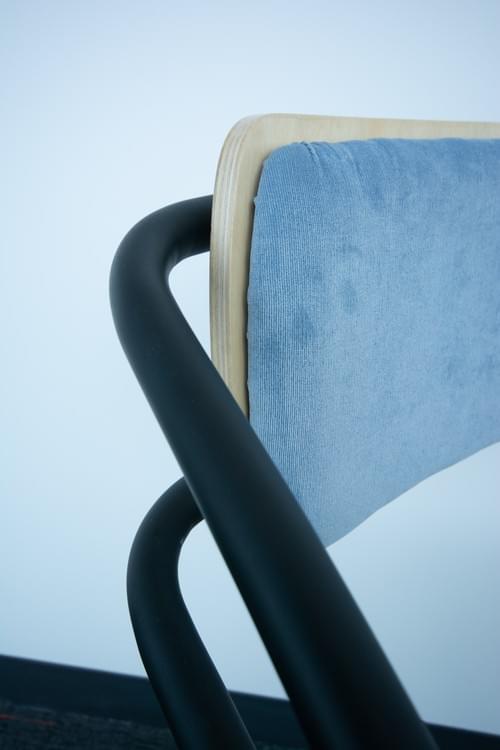
During the build process, our group decided financially and practically it made the most sense to construct 4 chairs, that way it reduced the cost and each member was able to take home their own Velos chair. The mold used to bend plywood was made from 2x4's and plywood cut to the rounded shape of our seat back. The mold was made long enough to produce 4 seat backs at a time, this was important for time and speed in the event any mistakes were made. A long sheet of wiggle board was then nailed down to the 2x4 mold to create a smooth round surface for our bent plywood to cure against. Both male and female molds were needed to keep even pressure on the plywood as it hardened. Once the molds were complete, sheets of plywood veneer were coated with heavy duty carpenters glue and placed in-between the two molds covered in wax paper and clamped down for 24 hours. This process had to be done quickly and carefully to ensure no air bubbles and gaps in the bent plywood. The bent plywood was cut out in the correct shape, sanded, and multiple coats of satin finish were then applied and left to dry.
While we worked on the plywood forms, we outsourced our steel tube bending and welding. We stayed in close contact with the manufacturer, making daily check ups and visits, to learn about the process and technique of metal tube bending. The Velos chair used 16 gauge steel tubing bent using a CNC bending machine. After each piece was cut and drilled it was then welded together by a master welder. The welding process left some slight discoloration and bumps in the frame that we grinded down and sanded out.

Finishing
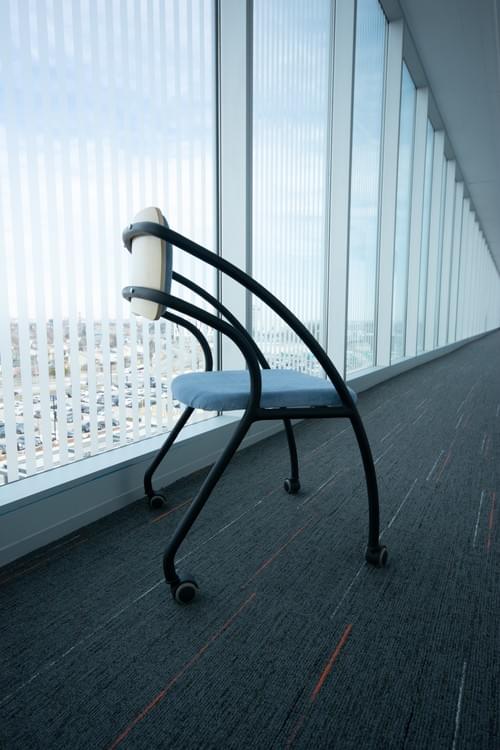
Once we took delivery of the metal frames and the plywood was all bent, we began the final finish and assembly. The first step was to sand and fill any imperfections in the metal frames. We used Bondo and scratch filler on the tubes to fill all dents, scratches, and poor welds. Once satisfied with the frames they were then sent to be primed and painted; 2 white, 2 black. The choice to use multiple colours was to show a cohesive design language while offering multiple colours and themes for the user to enjoy. The two fabric choices were light blue and grey. Both colours are proven to reduce stress and exemplify comfort, something we thought would help aid in the design direction of the Velos chair. Once all plywood was sanded and stained to a professional grade finish we began to upholster using 1 inch dense foam. The fabric for the seat was stretched over the foam and plywood, stapled onto the underside plywood and then a white sheet was stapled on to achieve a high quality look. The back rest was slightly different as it had a substrate sheet of plywood that was upholstered and then bolted into the bent plywood back. Finally wood/carpet castors were placed in the bottom of the chair legs.

Prototype
The final prototype was then placed around Humber and photographed in-situ. The Velos chair is a conference room chair designed to be comfortable for about 1-2 hours, based on research of average meeting lengths. The idea was to be comfortable long enough to get work done while still encouraging movement and collaboration. The laid back front tubes allow users to easily slide in under the edge of a desk while still having arm support. The chair encourages an upright working posture for all users at a desk or collaborating with team members. The sleek aerodynamic design of the Velos chair makes it the perfect conference room chair for all modern buildings.

Professional Feedback
To celebrate the chair project Humber holds an annual Chair Show where industry professionals are invited to take part, provide feedback and judge the chairs. The show was the best feedback we received on our design. The judges helped to point out flaws, places for improvement, as well as commented on the features we did well. They pointed out that our seat back was angled too far forward, castors were not exactly perpendicular to the ground resulting in uneven movement, as well as the difficulty of shipping a chair like ours. We absorbed the feedback and will use it to improve on future projects. They judges did have some positive feedback as well, they enjoyed the innovative shape and design, the colour choices for our intended use, and the overall difficulty of executing a chair to the level we had.


